
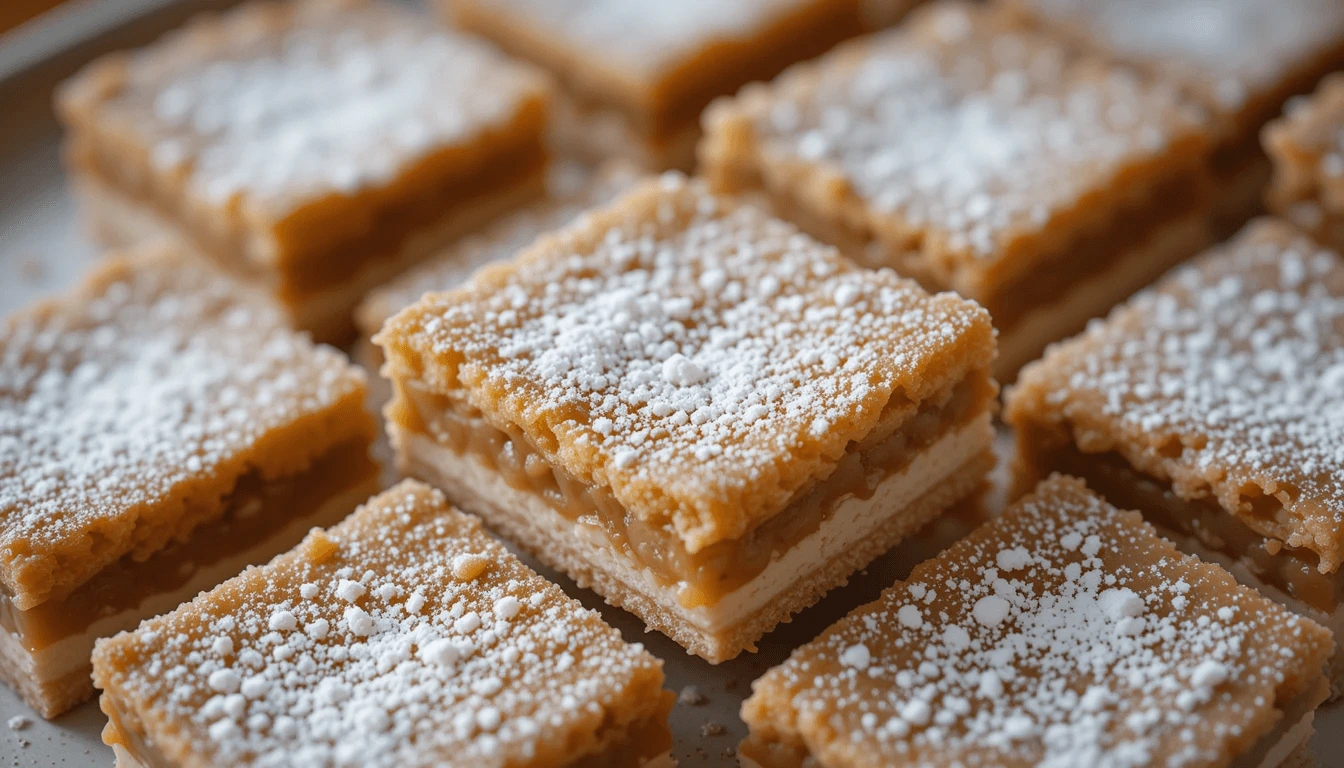
Who can resist the buttery, gooey goodness of chess bars? This classic Southern dessert is the perfect combination of simplicity and indulgence, making it a favorite for gatherings, holidays, or just a cozy night at home. With their rich flavor and melt-in-your-mouth texture, chess bars are not only easy to make but also endlessly versatile. Whether you’re new to baking or a seasoned pro, this recipe is sure to become your go-to for a crowd-pleasing treat. Ready to savor every buttery bite? Let’s dive in!
Table of Contents
Key Benefits of Making Chess Bars
Chess bars are more than just a dessert—they’re a little slice of comfort that’s as easy to make as it is to enjoy. Here’s why you’ll love them:
- Quick and Simple: With just a handful of pantry staples, you can whip up a decadent treat in no time.
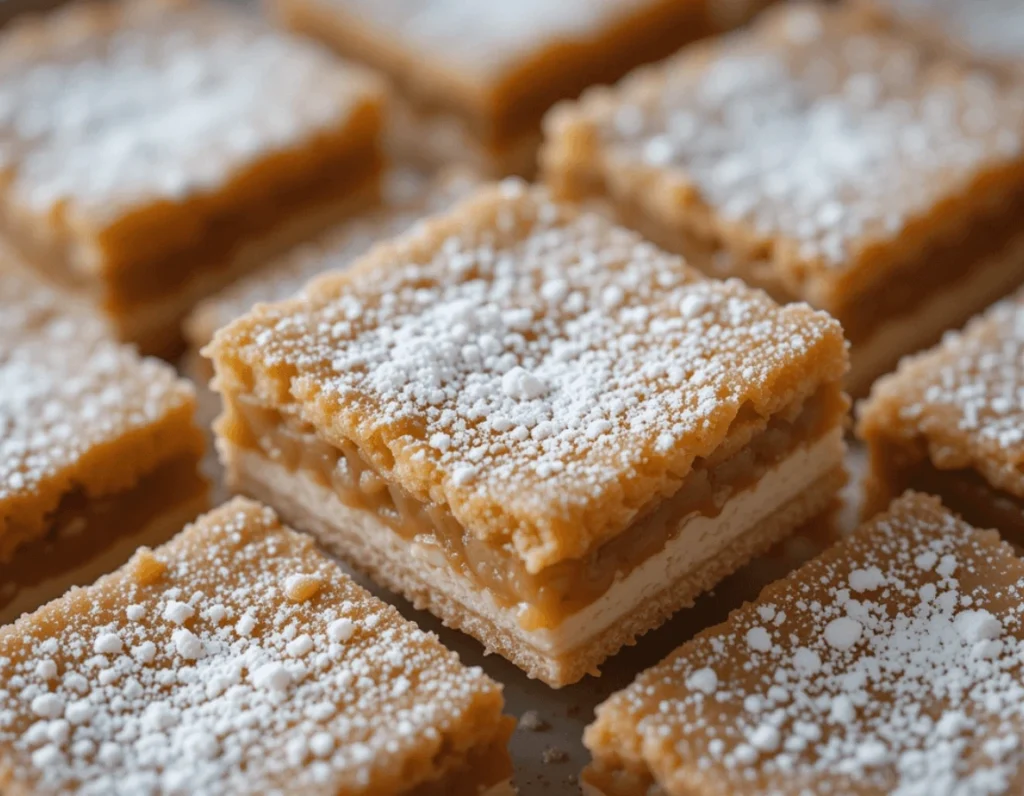
- Rich, Buttery Flavor: The combination of a tender crust and creamy, gooey filling delivers an irresistible balance of textures and flavors.
- Perfect for Any Occasion: Whether you’re hosting a party, attending a potluck, or looking for a sweet addition to family dinner, chess bars fit the bill.
- Customizable to Your Taste: From classic vanilla to zesty lemon or even chocolate variations, you can easily adapt the recipe to suit your cravings.
- Crowd-Pleaser: These bars are always a hit, leaving guests asking for the recipe after just one bite.
Chess bars make baking feel approachable, even for beginners. If you’re ready to create a dessert that everyone will rave about, you’re in the right place!
Ingredients for Chess Bars
To make these buttery, melt-in-your-mouth chess bars, you’ll need a mix of simple pantry staples and fresh ingredients. Here’s everything you’ll want to have on hand:
For the Crust:
- Yellow Cake Mix (1 box, about 15.25 oz) – A time-saving shortcut that forms the perfect foundation for your bars.
- Unsalted Butter (½ cup, melted) – Adds richness and ensures a tender, flavorful crust.
- Egg (1 large) – Helps bind the crust and adds structure.
For the Filling:
- Cream Cheese (8 oz, softened) – The secret to a creamy, luscious filling.
- Eggs (2 large) – These create a smooth, custard-like texture.
- Vanilla Extract (1 teaspoon) – Enhances the flavor with a warm, aromatic touch.
- Powdered Sugar (4 cups) – Sweetens the filling and gives it that smooth, velvety consistency.
Tips for Perfect Prep:
- Softening Cream Cheese: Take the cream cheese out of the fridge at least 30 minutes before starting. If you’re short on time, microwave it in 10-second intervals until just softened.
- Room-Temperature Eggs: Let the eggs come to room temperature to ensure they blend seamlessly into the batter.
- Use Quality Ingredients: High-quality vanilla extract and butter make a noticeable difference in flavor.
Once you’ve gathered your ingredients, you’re ready to dive into the step-by-step process. Let’s start baking!
Instructions
Now that you’ve gathered your ingredients, it’s time to put everything together. Don’t worry—this is a straightforward process, and I’ll walk you through each step. Let’s get baking!
1. Prepare the Crust
- Preheat your oven to 350°F (175°C).
- Grease a 9×13-inch baking pan or line it with parchment paper for easy removal.
- In a mixing bowl, combine the yellow cake mix, melted butter, and egg. Stir until well combined and a soft dough forms.
- Press the dough evenly into the bottom of your prepared pan. It doesn’t need to be perfect—just get it nice and smooth.
2. Make the Filling
- In a separate mixing bowl, beat the cream cheese until it’s smooth and creamy.
- Add the eggs, vanilla extract, and powdered sugar. Mix until completely smooth and well incorporated.
- Pour the cream cheese filling over the crust, spreading it evenly with a spatula. It’ll look like a lot of filling, but don’t worry—this is what gives the chess bars their signature, gooey texture!
3. Bake the Bars
- Place the pan in the preheated oven and bake for 30-40 minutes, or until the top is lightly golden, and the filling has set.
- You can check by inserting a toothpick—it should come out mostly clean, though a few crumbs are fine.
- Let the bars cool completely in the pan. They’ll firm up as they cool, making them easier to cut into perfect squares.
4. Cut and Serve
- Once cooled, slice the chess bars into squares. If you used parchment paper, just lift them out of the pan for neat slices.
- Serve and enjoy the delicious buttery goodness!

Pro Tip:
For extra flavor, try adding a little lemon zest or chocolate chips to the filling. It’s a fun way to switch things up and add a personal twist to your chess bars.
Pro Tips and Variations
Chess bars are not only easy to make but also highly customizable! Once you’ve mastered the basic recipe, you can add your own creative twist. Here are some pro tips and fun variations to help you elevate your chess bars:
Pro Tips for Perfect Chess Bars
- Use Room Temperature Ingredients: Let your cream cheese and eggs sit at room temperature for about 30 minutes before mixing. This helps them blend smoothly into the filling, preventing any lumps.
- Don’t Overmix: When preparing the filling, mix the ingredients until smooth. Overmixing can cause the texture to become too airy instead of the dense, creamy consistency we want.
- Check for Doneness: Keep an eye on your chess bars as they bake. At around the 30-minute mark, the top should be lightly golden, and the filling should have set with only a slight wobble in the center.
- Cool Completely: Allow the bars to cool completely in the pan before cutting. This will help the filling firm up, making it easier to slice cleanly without it falling apart.
Flavor Variations to Try
- Chocolate Chess Bars: Add a handful of chocolate chips to the filling, or substitute the yellow cake mix with chocolate cake mix. This variation is perfect for chocolate lovers.
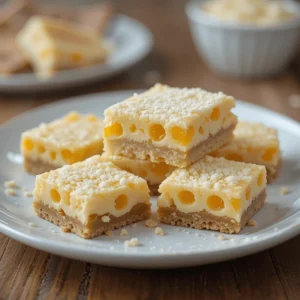
- Lemon Chess Bars: For a refreshing twist, mix in the zest of a lemon and a tablespoon of lemon juice. This brightens up the bars with a tangy flavor that balances the sweetness.
- Nutty Crunch: Stir in chopped pecans or walnuts into the filling. This adds a delightful crunch that pairs perfectly with the soft, creamy texture.
- Caramel Swirl: Drizzle caramel sauce over the top before baking, then swirl it into the filling with a knife. This adds a rich, gooey sweetness to each bite.
Storage Tips
- Keep Them Fresh: Store your chess bars in an airtight container at room temperature for up to 3 days. If you need to keep them longer, pop them in the fridge where they’ll stay fresh for up to a week.
Freezing: Chess bars freeze well! Wrap them tightly in plastic wrap and foil, and store them in a freezer-safe container. They’ll last up to 2 months in the freezer. To enjoy, simply thaw in the fridge overnight and they’re ready to serve.
Serving Suggestions
Once your chess bars are fresh out of the oven and cooled to perfection, it’s time to serve them up! These treats are fantastic on their own, but there are plenty of creative ways to enhance their flavor and presentation for any occasion.
Serve with a Sweet Topping
- Whipped Cream or Ice Cream: Serve your chess bars with a dollop of freshly whipped cream or a scoop of vanilla ice cream. The cool, creamy topping beautifully contrasts the rich, warm bars, making each bite even more indulgent.
- Caramel Drizzle: For an extra touch of sweetness, drizzle caramel sauce over the bars before serving. It adds a velvety richness that pairs wonderfully with the buttery filling.
Pair with Fresh Fruit
- Add a burst of freshness by serving your chess bars with fresh berries, like strawberries, blueberries, or raspberries. The natural tartness of the fruit complements the sweetness of the bars, creating a perfect balance of flavors. It’s also a great way to add a pop of color to your presentation!
Perfect for Special Occasions
- Whether you’re hosting a family gathering or a special holiday meal, chess bars are always a hit. For a festive touch, dust the top with a light sprinkle of powdered sugar or cinnamon. You can even cut the bars into smaller squares to serve them as part of a larger dessert spread.
- You can also get creative by decorating them with chocolate shavings, toffee bits, or chopped nuts to add texture and flavor.
Enjoy with a Hot Drink
- Chess bars pair wonderfully with a cup of coffee, tea, or hot cocoa. Whether it’s a morning treat or an afternoon snack, the comforting warmth of your beverage will perfectly complement the rich, buttery goodness of the bars. Try them with a robust dark roast coffee or a soothing chai tea for a satisfying pairing.
Snack or Dessert Platter
- For parties or gatherings, consider cutting the chess bars into small squares and serving them alongside other treats like brownies, cookies, and mini cupcakes. They’re a great addition to any dessert platter and allow guests to sample a variety of flavors.
With these serving ideas, your chess bars will shine as the perfect dessert for any occasion, whether you’re indulging solo or sharing with friends and family.
Conclusion
There you have it—a simple, yet irresistible recipe for chess bars that’s bound to become a favorite in your household! These buttery, sweet bars are a perfect treat for any occasion, whether you’re looking for a quick snack, a dessert for a special meal, or a way to impress guests at your next gathering. With just a few basic ingredients and easy steps, you can create a batch of delicious, golden chess bars that are sure to be a crowd-pleaser.
Remember, the beauty of chess bars is in their versatility. You can tweak the recipe to suit your preferences—whether you love adding a chocolatey twist, a zesty lemon flavor, or even a crunchy nutty topping. The options are endless, making it easy to experiment and find your perfect version.
The best part? These bars are simple to store, and you can enjoy them over the course of several days. Whether you keep them at room temperature or pop them in the fridge or freezer, they stay fresh and tasty. So, go ahead and share this recipe with friends and family or savor them all for yourself.
We hope you enjoy making these chess bars as much as we do. They’re guaranteed to bring joy and a little extra sweetness to any moment. Happy baking, and don’t forget to share the love!
Chess Bars
Ingredients
For the Crust:
- Yellow Cake Mix 1 box, about 15.25 oz – A time-saving shortcut that forms the perfect foundation for your bars.
- Unsalted Butter ½ cup, melted – Adds richness and ensures a tender, flavorful crust.
- Egg 1 large – Helps bind the crust and adds structure.
For the Filling:
- Cream Cheese 8 oz, softened – The secret to a creamy, luscious filling.
- Eggs 2 large – These create a smooth, custard-like texture.
- Vanilla Extract 1 teaspoon – Enhances the flavor with a warm, aromatic touch.
- Powdered Sugar 4 cups – Sweetens the filling and gives it that smooth, velvety consistency.
Tips for Perfect Prep:
- Softening Cream Cheese: Take the cream cheese out of the fridge at least 30 minutes before starting. If you’re short on time microwave it in 10-second intervals until just softened.
- Room-Temperature Eggs: Let the eggs come to room temperature to ensure they blend seamlessly into the batter.
- Use Quality Ingredients: High-quality vanilla extract and butter make a noticeable difference in flavor.
Instructions
Prepare the Crust
- Preheat your oven to 350°F (175°C).
- Grease a 9×13-inch baking pan or line it with parchment paper for easy removal.
- In a mixing bowl, combine the yellow cake mix, melted butter, and egg. Stir until well combined and a soft dough forms.
- Press the dough evenly into the bottom of your prepared pan. It doesn’t need to be perfect—just get it nice and smooth.
Make the Filling
- In a separate mixing bowl, beat the cream cheese until it’s smooth and creamy.
- Add the eggs, vanilla extract, and powdered sugar. Mix until completely smooth and well incorporated.
- Pour the cream cheese filling over the crust, spreading it evenly with a spatula. It’ll look like a lot of filling, but don’t worry—this is what gives the chess bars their signature, gooey texture!
Bake the Bars
- Place the pan in the preheated oven and bake for 30-40 minutes, or until the top is lightly golden, and the filling has set.
- You can check by inserting a toothpick—it should come out mostly clean, though a few crumbs are fine.
- Let the bars cool completely in the pan. They’ll firm up as they cool, making them easier to cut into perfect squares.
- Cut and Serve
- Once cooled, slice the chess bars into squares. If you used parchment paper, just lift them out of the pan for neat slices.
- Serve and enjoy the delicious buttery goodness!
Pro Tip:
- For extra flavor, try adding a little lemon zest or chocolate chips to the filling. It’s a fun way to switch things up and add a personal twist to your chess bars
Notes
FAQs about Chess Bars
1. Can I use a different cake mix for this recipe?
Absolutely! The beauty of chess bars lies in their versatility. You can easily substitute the yellow cake mix with chocolate cake mix, spice cake mix, or even lemon cake mix for a unique twist on the classic. Each variation will bring its own flavor, so feel free to get creative with what you have on hand.
2. How do I store leftover chess bars?
If you have any leftovers (which is rare!), store your chess bars in an airtight container at room temperature for up to 3 days. For longer storage, place them in the fridge for up to a week. To freeze, wrap the bars tightly in plastic wrap or foil, and store them in a freezer-safe container. They’ll last for about 2 months and can be easily thawed overnight in the fridge.
3. Can I make these bars ahead of time?
Yes! Chess bars are perfect for making ahead. You can bake them a day or two before your event or gathering. Just let them cool completely before storing them in an airtight container. When you’re ready to serve, you can either enjoy them as-is or warm them slightly for that freshly-baked taste.
4. Can I add nuts to the filling?
Of course! If you love a bit of crunch, try adding chopped pecans, walnuts, or almonds to the filling. This adds an extra layer of texture and flavor, making the bars even more indulgent. Feel free to adjust the amount based on your preferences.
1 thought on “The Best Chess Bars Love: A Buttery Treat to Savor!”