
If you’ve ever craved the perfect chocolate chip cookie—one that’s soft in the center, crispy at the edges, and packed with gooey chocolate—you’re in for a treat. There’s something magical about the aroma of freshly baked cookies wafting through your kitchen, turning an ordinary day into something special. Whether you’re baking with family, preparing a thoughtful gift, or simply indulging yourself, this illustrated guide will show you exactly how to create cookies that rival any bakery. Ready to master this classic and versatile recipe? Let’s dive in!
Table of Contents
Benefits Chocolate Chip Cookies
When it comes to baking, few things are as satisfying as pulling a tray of perfectly baked chocolate chip cookies from the oven. This recipe isn’t just about making cookies; it’s about creating moments of joy and connection. Here’s why you’ll love this recipe:
- Irresistible Texture: These cookies strike the ideal balance between soft, chewy centers and delightfully crisp edges.
- Rich Flavor: A mix of brown sugar and vanilla extract enhances the cookie’s natural sweetness, while the chocolate chips deliver melty goodness in every bite.
- Foolproof Process: Whether you’re a seasoned baker or just starting out, this recipe is easy to follow with clear, step-by-step instructions.
- Customizable to Your Taste: Prefer dark chocolate? Want to add nuts? This recipe is flexible enough for endless variations.
- Perfect for Any Occasion: Bake them as a quick treat, holiday gift, or dessert centerpiece—the possibilities are endless.
Baking these cookies isn’t just about the results; it’s about enjoying the process, too. From the satisfying act of mixing the dough to the comforting aroma of cookies baking, this recipe transforms a simple treat into a delightful experience.
Ingredients for Chocolate Chip Cookies

Let’s make sure your pantry is ready for cookie greatness. With just a few simple, carefully selected ingredients, you’ll achieve that perfect mix of flavor and texture. Here’s what you’ll need:
Dry Ingredients
- 2 ¼ cups all-purpose flour: This provides the structure. Want chewier cookies? Swap a small portion for bread flour.
- 1 teaspoon baking soda: The key to light, perfectly risen cookies.
- ½ teaspoon salt: Don’t skip this—it amplifies the sweetness and enhances flavor balance.
Wet Ingredients
- 1 cup unsalted butter (softened): Creates a rich, buttery base. Pro tip: For extra flavor, brown the butter and let it cool before using.
- ¾ cup brown sugar: Adds moisture and a subtle caramel undertone.
- ½ cup granulated sugar: Balances sweetness and helps the cookies spread just right.
- 2 large eggs: Essential for binding the ingredients and adding richness. Use room-temperature eggs for smoother mixing.
- 2 teaspoons vanilla extract: Enhances every other flavor in the recipe with a warm, sweet note.
Mix-Ins
- 2 cups chocolate chips: Semi-sweet is classic, but you can experiment with dark, milk, or even white chocolate.
- Optional: ½ cup chopped nuts: Walnuts or pecans add a delightful crunch if you’re feeling adventurous.
Helpful Tips
- Measure with care: Use the spoon-and-level method for flour to avoid overpacking, which can make your cookies dense.
- Chill for perfection: Chilling the dough (coming up in the instructions) is crucial for a better texture and flavor.
Now that your ingredients are ready, let’s dive into the fun part—bringing it all together!
Instructions for Chocolate Chip Cookies
Ready to bake the best chocolate chip cookies? Follow these step-by-step directions, and you’ll be on your way to creating the perfect batch with ease.
Step 1: Prepare Your Baking Space
- Preheat your oven to 350°F (175°C). This ensures even baking from the moment the cookies hit the oven.
- Line two baking sheets with parchment paper or silicone baking mats to prevent sticking and make cleanup easier.
Step 2: Combine Dry Ingredients
- In a medium bowl, whisk together flour, baking soda, and salt. Mixing these first ensures the leavening agents are evenly distributed throughout the dough.
Step 3: Cream Butter and Sugars
- In a large mixing bowl, beat the butter, brown sugar, and granulated sugar together using a hand or stand mixer. Mix on medium speed until the texture is smooth and fluffy—this step creates the foundation for soft and tender cookies.
Step 4: Add Wet Ingredients
- Mix in the eggs, one at a time, ensuring each is fully incorporated.
- Stir in the vanilla extract to enhance the rich, sweet flavor of your cookies.
Step 5: Incorporate the Dry Ingredients
- Gradually add the dry mixture to the wet ingredients. Mix on low speed to avoid overworking the dough, which can lead to dense cookies. Stop as soon as the flour is fully blended.
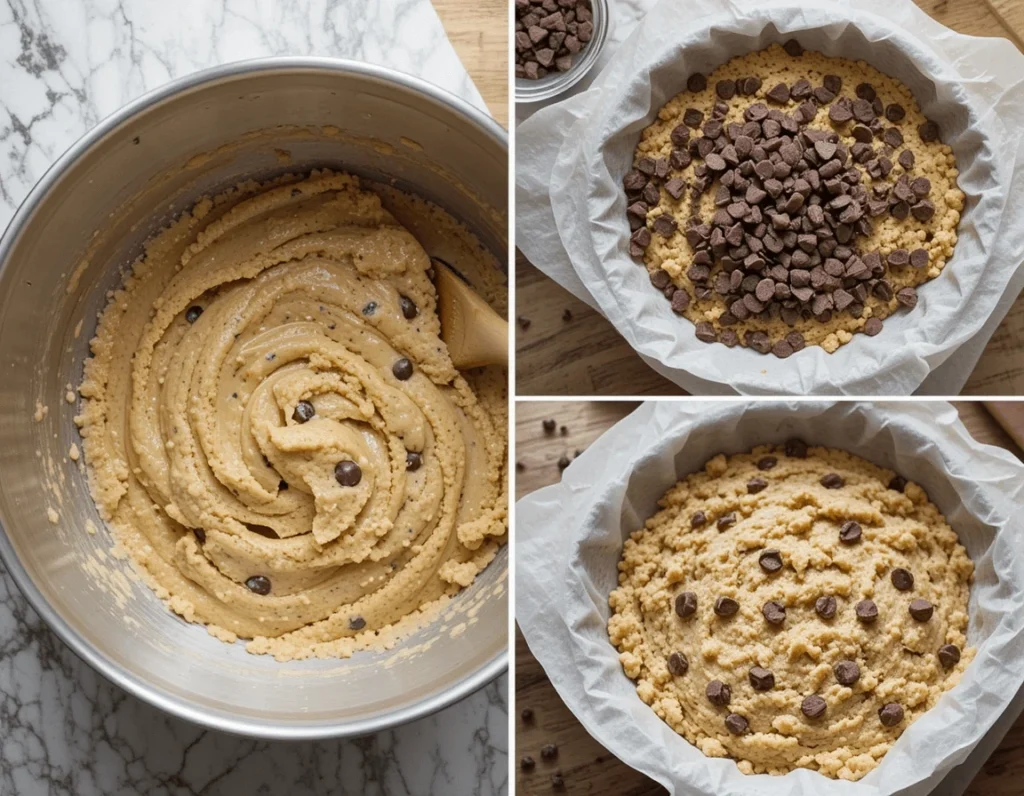
Step 6: Fold in the Chocolate Chips
- Gently fold in chocolate chips (and nuts, if using) with a spatula. This step ensures every cookie has a generous helping of chocolate.
Step 7: Chill the Dough
- For the best texture, cover the dough and refrigerate it for at least 30 minutes. Chilling prevents the cookies from spreading too much while baking and enhances their flavor.
Step 8: Shape the Dough
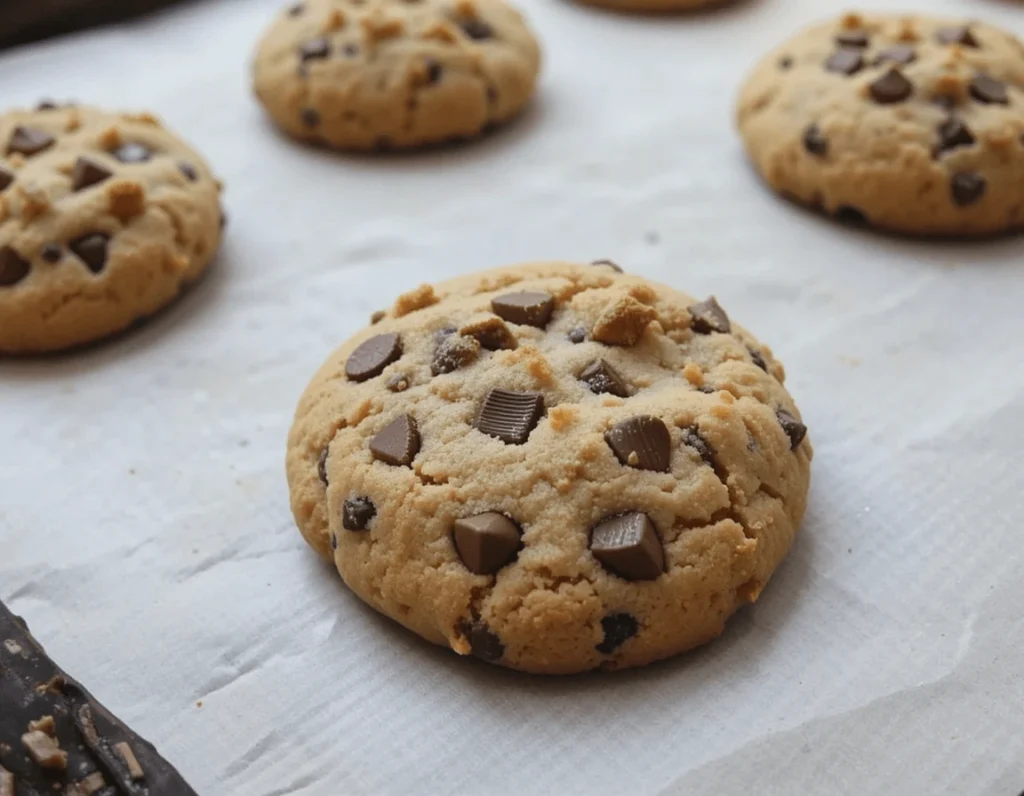
- Scoop the dough into 1 ½-tablespoon portions and roll them into balls. Place them on the prepared baking sheets, leaving about 2 inches of space between each cookie.
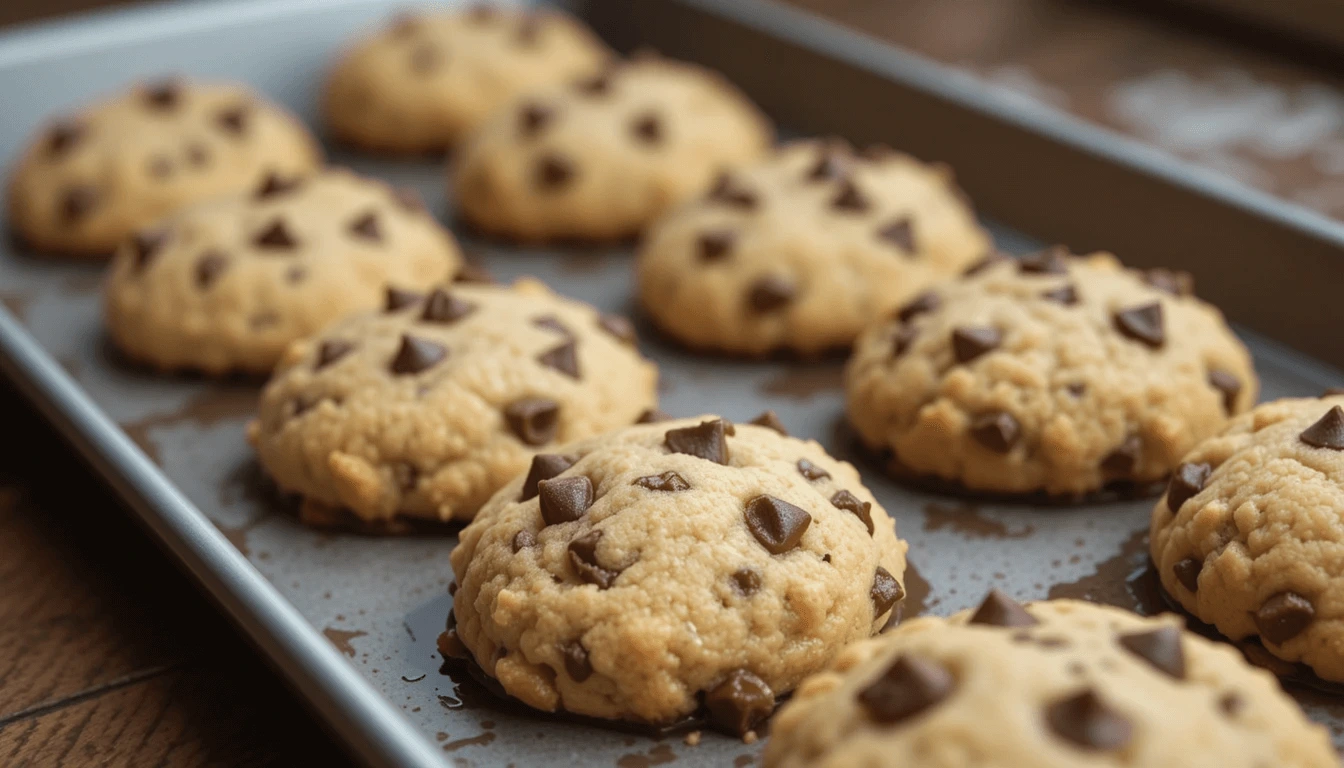
Step 9: Bake
- Bake in the preheated oven for 10-12 minutes, or until the edges are lightly golden, and the centers look slightly underdone. The cookies will continue to set as they cool.
Step 10: Cool and Enjoy
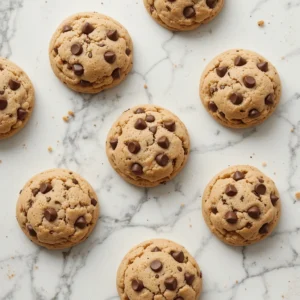
- Allow the cookies to cool on the baking sheet for 5 minutes, then transfer them to a wire rack to cool completely. Or, treat yourself to one warm—there’s nothing better than melty chocolate in every bite!
With these easy-to-follow steps, you’ll achieve bakery-quality cookies that everyone will rave about. Up next, let’s explore some pro tips and creative variations to make this recipe your own!
Pro Tips and Variations
Looking to take your chocolate chip cookies from great to extraordinary? Here are some expert tips and fun variations to customize your recipe and elevate your baking game.
Pro Tips for the Perfect Cookie
- Measure Your Ingredients Correctly: Accurate measurements are crucial. If you can, use a kitchen scale to weigh your flour for the best results. Too much flour can make your cookies dry, while too little can affect the texture.
- Butter Temperature Matters: Always use softened butter (not melted or cold). Room-temperature butter mixes better with sugars, helping to create that perfect cookie dough.
- Chill the Dough: Don’t skip this step! Chilling your cookie dough for at least 30 minutes helps prevent excessive spreading and enhances the flavor. It also leads to a thicker, chewier cookie.
- Don’t Overmix the Dough: Mix the ingredients until just combined. Overmixing can develop the gluten in the flour, making your cookies tough instead of tender.
- Watch the Baking Time: Since oven temperatures vary, check your cookies a minute or two before the recommended baking time. When the edges are golden and the centers look slightly underdone, they’re perfect for a chewy texture.
Delicious Variations to Try
- Double Chocolate Cookies: Add cocoa powder to the dry ingredients (about ¼ cup), and use white chocolate chips along with regular chocolate chips for a rich, indulgent flavor.
- Nutty Delight: Add a half cup of chopped walnuts, pecans, or almonds to the dough. The nuts provide a delightful crunch and enhance the flavor profile.
- Salted Caramel Twist: Once your cookies have cooled, drizzle them with melted caramel and a sprinkle of sea salt for a sweet and salty treat.
- Oatmeal Chocolate Chip Hybrid: For a chewy texture, replace a cup of flour with rolled oats. This variation gives your cookies a heartier bite, perfect for a more rustic flavor.
- Spicy Chocolate Chip Cookies: Add a pinch of cinnamon or a teaspoon of espresso powder to the dry ingredients for a warm, spiced note that complements the chocolate.
- Coconut Lovers: Stir in shredded coconut to the dough for a tropical twist on your classic chocolate chip cookies.
Storage and Freezing Tips
- Cookie Dough: You can freeze cookie dough! Scoop out dough balls and place them on a baking sheet to freeze. Once frozen, transfer them to a freezer-safe bag and store for up to 3 months. Bake them straight from the freezer, adding an extra 1-2 minutes to the baking time.
- Baked Cookies: Store cooled cookies in an airtight container at room temperature for up to 5 days to maintain their freshness. For longer storage, freeze baked cookies in a resealable bag and thaw them when you’re ready to enjoy.
With these expert tips and exciting variations, you can make each batch of chocolate chip cookies uniquely yours. Don’t be afraid to experiment with new flavors or techniques—your perfect cookie awaits! Ready to serve up your delicious creations? Let’s explore some fantastic ways to present and enjoy them in the next section!
Serving Suggestions
Chocolate chip cookies are already a treat on their own, but with a little creativity, you can elevate the experience and turn them into something truly special. Here are some fun serving ideas to make your cookies even more irresistible!
1. Classic with a Twist
Serve your cookies warm, straight from the oven, with a side of vanilla ice cream. The melty chocolate paired with cool, creamy ice cream creates the perfect contrast. For an extra indulgent experience, drizzle a bit of hot fudge sauce over the top.
2. Cookie Sundaes
Transform your cookies into a cookie sundae by layering warm cookies in a bowl, topping with ice cream, and adding your favorite toppings—think whipped cream, chocolate syrup, or even a sprinkle of crushed pretzels for some salty crunch.
3. Dipped in Milk
There’s something magical about dunking a freshly baked chocolate chip cookie into a glass of milk. Opt for a tall glass of whole milk, almond milk, or even chocolate milk for an extra treat. This is a timeless combination that everyone loves.
4. Cookie Plates for Parties
For a fun and casual dessert at your next gathering, arrange your cookies on a plate along with some other homemade treats, such as brownies, blondies, or mini cupcakes. This variety lets everyone indulge in different flavors while enjoying a classic cookie.
5. Gift-Worthy Packaging
Cookies make great gifts! After cooling, place your cookies in a decorative tin or wrap them in cellophane bags with a festive ribbon. They’re perfect for giving to friends, family, or colleagues for birthdays, holidays, or as a thoughtful homemade gift.
6. Pair with Coffee or Tea
For a more refined touch, pair your cookies with a warm cup of coffee or tea. A rich espresso or a lightly spiced chai complements the sweetness of the cookies perfectly, making it an ideal treat for a relaxing afternoon.
7. Make a Cookie Bar
For a fun twist, serve cookies on a cookie bar at your next event. Offer a variety of toppings and spreads, such as peanut butter, Nutella, or cream cheese frosting, allowing guests to top their cookies however they like. This is a great way to make your cookies the star of the party!
Whether you’re serving them after dinner or as a sweet snack, these ideas are sure to impress your guests and elevate your chocolate chip cookie experience. And with these options, there’s always a new way to enjoy your delicious cookies! Ready to wrap it up with some frequently asked questions? Let’s go to the next section!
Conclusion
There’s no doubt about it—chocolate chip cookies are a timeless favorite. Whether you’re baking for a family gathering, a sweet snack, or a special gift, this recipe guarantees delicious results every time. By following the step-by-step instructions, incorporating the pro tips, and exploring the fun variations, you’ll be well on your way to creating the best cookies ever.
Remember, the beauty of baking lies in the little tweaks and adjustments that make a recipe uniquely yours. From adding extra chocolate to experimenting with different nuts or spices, there’s no wrong way to make these cookies your own. The possibilities are endless, and each batch is an opportunity to make something delicious and memorable.
So, preheat your oven, gather your ingredients, and get ready to enjoy the warm, comforting smell of freshly baked chocolate chip cookies. Share them with friends and family or savor them for yourself—they’re sure to bring smiles to everyone’s face.
Chocolate Chip Cookies
Ingredients
Dry Ingredients
- 2 ¼ cups all-purpose flour: This provides the structure. Want chewier cookies? Swap a small portion for bread flour.
- 1 teaspoon baking soda: The key to light perfectly risen cookies.
- ½ teaspoon salt: Don’t skip this—it amplifies the sweetness and enhances flavor balance.
Wet Ingredients
- 1 cup unsalted butter softened: Creates a rich, buttery base. Pro tip: For extra flavor, brown the butter and let it cool before using.
- ¾ cup brown sugar: Adds moisture and a subtle caramel undertone.
- ½ cup granulated sugar: Balances sweetness and helps the cookies spread just right.
- 2 large eggs: Essential for binding the ingredients and adding richness. Use room-temperature eggs for smoother mixing.
- 2 teaspoons vanilla extract: Enhances every other flavor in the recipe with a warm sweet note.
Mix-Ins
- 2 cups chocolate chips: Semi-sweet is classic but you can experiment with dark, milk, or even white chocolate.
- Optional: ½ cup chopped nuts: Walnuts or pecans add a delightful crunch if you’re feeling adventurous.
Helpful Tips
- Measure with care: Use the spoon-and-level method for flour to avoid overpacking which can make your cookies dense.
- Chill for perfection: Chilling the dough coming up in the instructions is crucial for a better texture and flavor.
Instructions
Step 1: Prepare Your Baking Space
- Preheat your oven to 350°F (175°C). This ensures even baking from the moment the cookies hit the oven.
- Line two baking sheets with parchment paper or silicone baking mats to prevent sticking and make cleanup easier.
Step 2: Combine Dry Ingredients
- In a medium bowl, whisk together flour, baking soda, and salt. Mixing these first ensures the leavening agents are evenly distributed throughout the dough.
Step 3: Cream Butter and Sugars
- In a large mixing bowl, beat the butter, brown sugar, and granulated sugar together using a hand or stand mixer. Mix on medium speed until the texture is smooth and fluffy—this step creates the foundation for soft and tender cookies.
Step 4: Add Wet Ingredients
- Mix in the eggs, one at a time, ensuring each is fully incorporated.
- Stir in the vanilla extract to enhance the rich, sweet flavor of your cookies.
Step 5: Incorporate the Dry Ingredients
- Gradually add the dry mixture to the wet ingredients. Mix on low speed to avoid overworking the dough, which can lead to dense cookies. Stop as soon as the flour is fully blended.
Step 6: Fold in the Chocolate Chips
- Gently fold in chocolate chips (and nuts, if using) with a spatula. This step ensures every cookie has a generous helping of chocolate.
Step 7: Chill the Dough
- For the best texture, cover the dough and refrigerate it for at least 30 minutes. Chilling prevents the cookies from spreading too much while baking and enhances their flavor.
Step 8: Shape the Dough
- Scoop the dough into 1 ½-tablespoon portions and roll them into balls. Place them on the prepared baking sheets, leaving about 2 inches of space between each cookie.
Step 9: Bake
- Bake in the preheated oven for 10-12 minutes, or until the edges are lightly golden, and the centers look slightly underdone. The cookies will continue to set as they cool.
Step 10: Cool and Enjoy
- Allow the cookies to cool on the baking sheet for 5 minutes, then transfer them to a wire rack to cool completely. Or, treat yourself to one warm—there’s nothing better than melty chocolate in every bite!
Notes
FAQs about Chocolate Chip Cookies
1. Can I use margarine instead of butter?
Yes, you can substitute margarine, but it will slightly change the texture and flavor. Butter tends to create a richer, more tender cookie, so if you can, stick with butter for the best results. That said, margarine can work in a pinch, especially for a softer texture.
2. Can I freeze chocolate chip cookie dough?
Absolutely! Freezing cookie dough is a great way to have fresh cookies anytime you want. Simply scoop the dough into individual cookie portions, place them on a baking sheet, and freeze until solid. Then, transfer the dough balls to a zip-top bag for up to 3 months. When you’re ready to bake, just pop them directly on a baking sheet and bake a little longer than usual.
3. How do I prevent my cookies from spreading too much?
To avoid overly spread-out cookies, try chilling the dough for at least 30 minutes before baking. This firms up the dough and reduces spreading. Additionally, ensure you’re using the right flour-to-butter ratio, as too much butter can lead to cookies that spread too thin.
4. Can I add other ingredients to the dough?
Definitely! Feel free to add a variety of mix-ins to customize your cookies. You could include chopped nuts, dried fruit, or even a handful of toffee chips for extra flavor. Just be mindful not to overload the dough; adding ½ cup to 1 cup of mix-ins works well.
5. How should I store leftover cookies?
Store your cookies in an airtight container at room temperature for up to 5 days. For longer storage, freeze the cookies in a resealable bag or container. They can stay fresh for up to 3 months in the freezer—just thaw when you’re ready to enjoy!
6. Can I make gluten-free chocolate chip cookies?
Yes, you can! Use a gluten-free flour blend as a substitute for regular flour. Make sure the chocolate chips you use are also gluten-free. You may need to adjust the baking time or other ingredients slightly, but it’s a great way to enjoy these cookies without gluten.
7. Why are my cookies turning out too cakey?
If your cookies are too cakey, it’s often due to too much flour or overmixing the dough. To fix this, ensure you measure your flour correctly, and mix the dough just until everything is combined. For a chewier texture, try using a little more brown sugar and baking them for a slightly shorter time.
8. How can I make my cookies chewier?
To get extra chewy cookies, use more brown sugar instead of white sugar, as it helps retain moisture. Adding an extra egg yolk also creates a softer, chewier texture. Lastly, bake the cookies for a slightly shorter time and let them cool on the baking sheet to maintain their chewiness.
These answers should guide you toward making the perfect batch of chocolate chip cookies, whether it’s your first time or you’re a seasoned pro. If you have any more questions or need further assistance, feel free to reach out. Happy baking!
3 thoughts on “The Best Chocolate Chip Cookies Illustrated Guide To Baking”
Comments are closed.