
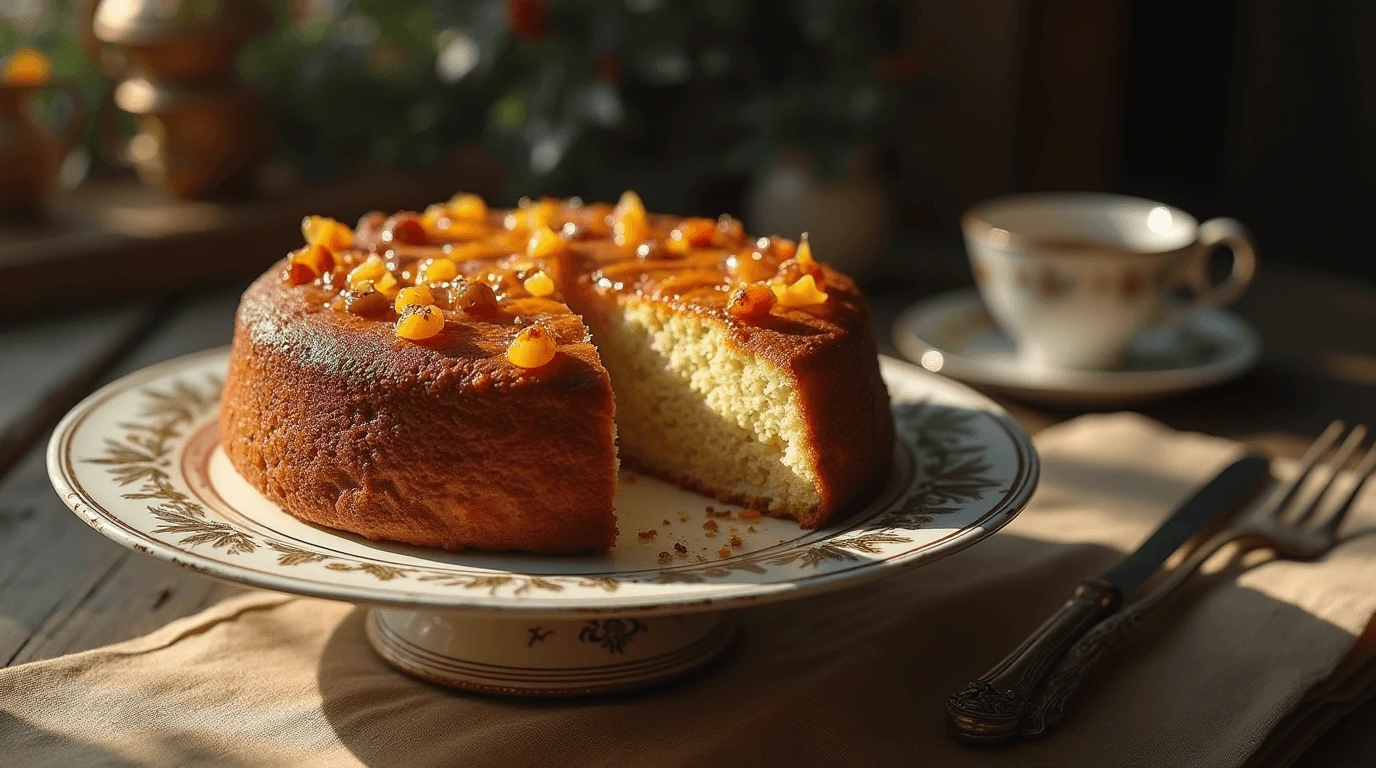
Have you ever wondered what it might feel like to bake like royalty? The 18th century queen cake is more than just a recipe—it’s a journey back in time to the elegance of traditional baking. With its buttery richness, delicate crumb, and subtle hints of citrus and spice, this vintage dessert is a classic that continues to captivate taste buds. Perfect for an afternoon tea or a special family gathering, queen cakes offer a touch of nostalgia with every bite. Let’s explore this enchanting recipe that blends history, flavor, and a little bit of magic from a bygone era into your kitchen.
Table of Contents
Key Benefits of the 18th Century Queen Cake Recipe
Queen cakes are more than just a delightful treat—they’re a piece of history brought to life in your kitchen. Here’s why you’ll love baking and savoring this enchanting recipe:
- A Taste of Tradition: This recipe preserves the charm of classic 18th-century baking, offering a rich, buttery flavor enhanced with subtle spices and zesty citrus notes.
- Simple Yet Elegant: Despite its historical roots, this cake is straightforward to make and perfect for impressing guests with its timeless elegance.
- Versatile and Customizable: Whether you’re following the traditional recipe or adding a modern twist with dried fruits or nuts, queen cakes can adapt to your preferences.
- Perfect for Every Occasion: These cakes are a hit at afternoon teas, brunches, or as an everyday indulgence when you crave something special.
- A Nostalgic Experience: Baking queen cakes connects you to a simpler time, infusing your kitchen with the comforting aromas of a bygone era.
With this recipe, you’ll create a dessert that feels both historic and contemporary—a perfect blend of flavor, heritage, and creativity. Ready to bring a royal touch to your table? Let’s get started!
Ingredients for the 18th Century Queen Cake Recipe
Gathering the right ingredients is the first step to recreating the charm of these classic queen cakes. Here’s everything you’ll need, along with a few tips to ensure success:
Main Ingredients
- 1 cup (225g) unsalted butter – Softened to room temperature for easy creaming.
- 1 cup (200g) granulated sugar – Provides the perfect level of sweetness.
- 4 large eggs – Preferably at room temperature to ensure a smooth batter.
- 1 ¾ cups (220g) all-purpose flour – Sifted for a light and fluffy texture.
- ½ cup (50g) almond flour – Adds richness and a subtle nutty flavor.
- 1 tsp baking powder – Helps the cakes rise beautifully.
- ½ tsp ground nutmeg – A traditional spice for a warm, aromatic note.
- Zest of 1 lemon – Brings a bright, citrusy freshness to the mix.
- 2 tbsp candied peel – Optional, but adds delightful bursts of flavor.
Optional Add-ins
- ¼ cup currants or raisins – For a traditional touch of sweetness.
- A splash of rose water – Enhances the historical authenticity with floral notes.
Tips for Ingredient Preparation
- Butter and Sugar: Cream these together thoroughly to incorporate air, resulting in a soft, tender crumb.
- Eggs: Crack eggs into a separate bowl before adding them to the batter to avoid shells or surprises.
- Almond Flour: If you don’t have almond flour, finely ground almonds are a great substitute.
By ensuring your ingredients are fresh and properly prepared, you’re setting the stage for queen cakes that are both historically authentic and irresistibly delicious. Now, let’s bring these ingredients to life with the baking process!
Instructions for Making the Queen Cakes
Let’s bring these elegant queen cakes to life! Follow these simple steps, and you’ll have a batch of beautifully golden, fragrant treats ready to impress.
Step 1: Prepare Your Workspace
- Preheat your oven to 350°F (175°C).
- Grease a muffin tin or line it with paper cases to prevent sticking and make cleanup easy.
- Gather all your ingredients and tools—this will make the process smooth and enjoyable.
Step 2: Cream Butter and Sugar
- In a large mixing bowl, beat the softened butter and sugar together until the mixture becomes pale and fluffy. This step helps create the light, tender crumb queen cakes are known for.
Step 3: Add the Eggs
- Crack the eggs into the bowl one at a time, mixing well after each addition.
- If the batter looks slightly curdled, don’t worry—it will come together when you add the dry ingredients.
Step 4: Combine the Dry Ingredients
- In a separate bowl, whisk together the all-purpose flour, almond flour, baking powder, and ground nutmeg.
- Gradually add the dry ingredients to the wet mixture, folding gently to avoid overmixing. Overmixing can lead to dense cakes, so aim for a smooth, airy batter.
Step 5: Add Flavor and Optional Ingredients
- Stir in the lemon zest and candied peel for a burst of traditional citrus flavor.
- If you’d like to add currants or a splash of rose water for extra authenticity, now’s the time. Mix gently to ensure even distribution.
Step 6: Fill and Bake
- Spoon the batter into your prepared muffin tin, filling each cup about two-thirds full. This ensures they’ll rise beautifully without spilling over.
- Place the tin in the oven and bake for 20–25 minutes, or until the tops are golden and a toothpick inserted into the center comes out clean.
Step 7: Cool and Finish
- Let the cakes cool in the tin for about 5 minutes, then transfer them to a wire rack to cool completely.
- Dust them lightly with powdered sugar for an elegant finish, or serve them plain for a more traditional presentation.
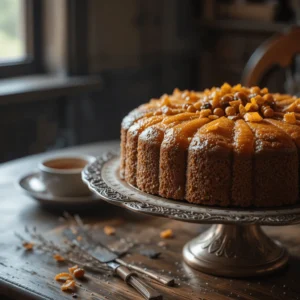
These queen cakes are as delightful to bake as they are to eat, filling your kitchen with the comforting aromas of history. Perfect for afternoon tea, special occasions, or simply enjoying a taste of nostalgia—these cakes are sure to enchant everyone at your table!

Pro Tips and Variations
To ensure your queen cakes turn out beautifully every time, here are some handy tips and exciting variations that will elevate your baking experience. Whether you’re looking for the traditional touch or want to add a personal twist, these suggestions will help you achieve a flawless result.
Pro Tips for Success
- Room-Temperature Ingredients Are Key
- Make sure your butter, eggs, and any other refrigerated ingredients are at room temperature. This helps create a smooth batter and ensures everything mixes evenly for a tender, light texture.
- Avoid Overmixing
- When you add the dry ingredients, mix gently. Overmixing can cause the cakes to become dense and tough, so fold everything together carefully until just combined.
- Proper Baking Time
- Start checking the cakes at the 20-minute mark. Insert a toothpick into the center—if it comes out clean or with just a few crumbs, they’re done. Keep an eye on them, as overbaking can dry them out.
- Let Them Cool Completely
- After baking, let the cakes cool for a few minutes in the tin before transferring them to a wire rack. Allowing them to cool completely ensures a clean finish when you dust them with powdered sugar or serve them.
- Uniform Portions
- For even baking, use an ice cream scoop or two spoons to divide the batter evenly among the muffin cups. This helps all the cakes bake at the same rate and ensures a consistent size.
Creative Variations to Try
- Spice It Up
- While nutmeg is traditional, feel free to add a touch of cinnamon, ginger, or allspice for an extra layer of warmth. A pinch of these spices will give your queen cakes a cozy, fragrant aroma.
- Dried Fruit Delight
- If you want to add a bit of sweetness and texture, try mixing in some dried currants, raisins, or chopped apricots. This gives the cakes a chewy contrast to their light crumb.
- Citrus Twist
- For an even brighter flavor, add a bit of orange zest to complement the lemon. The citrusy duo will add a fresh, uplifting taste to each bite.
- Floral Flavors
- For an 18th-century flair, stir in a teaspoon of rose water or orange blossom water. These floral notes bring a unique, elegant taste that pairs beautifully with the cake’s buttery richness.
- Add Nuts for Crunch
- If you love a bit of crunch, finely chopped almonds, pistachios, or hazelnuts are perfect for mixing into the batter or sprinkling on top. The nuts bring a lovely texture and a rich flavor that pairs perfectly with the delicate sweetness of the cake.
- Make It Gluten-Free
- If you need a gluten-free option, substitute the all-purpose flour with a gluten-free blend. The almond flour already adds moisture, so this substitution should maintain the cake’s tender crumb.
These tips and variations not only help you create perfect queen cakes but also encourage creativity in the kitchen. Whether you stick with the classic or experiment with new flavors, you’re bound to impress with this delightful dessert!
Serving Suggestions
Once your queen cakes are perfectly baked and cooled, it’s time to think about how to present and enjoy them! Here are some creative and delicious serving ideas that will complement their delicate flavor and elevate your experience.
Classic Tea Time Treat
- Perfect with Tea: Queen cakes are a timeless treat to serve alongside a pot of tea. Pair them with a light, floral tea like Earl Grey or a fragrant chamomile for a truly elegant afternoon.
- How to Serve: Dust the cakes lightly with powdered sugar for a classic look, or serve them plain for a more rustic charm.
For Special Occasions
- Festive Touch: For special celebrations, like birthdays or afternoon teas, you can drizzle a simple glaze (made from powdered sugar and lemon juice) over the cakes for a glossy, sweet finish.
- Add Fruit: Serve the queen cakes with fresh berries like raspberries, strawberries, or blackberries. Their tartness balances the sweetness of the cakes perfectly.
Modern Pairings
- Whipped Cream or Clotted Cream: If you’re craving something extra indulgent, serve these cakes with a dollop of fresh whipped cream or clotted cream. This adds richness that complements the light, airy texture of the cakes.
- Ice Cream Option: For a unique twist, serve them warm with a scoop of vanilla or lemon ice cream. The contrast of warm and cold will delight your taste buds.
Storage and Leftovers
- Storing Leftovers: Queen cakes are best enjoyed fresh, but if you have leftovers, store them in an airtight container at room temperature for up to 3 days. For longer storage, you can freeze them for up to a month.
- Reviving Frozen Cakes: When ready to enjoy, thaw the cakes at room temperature or warm them up in the oven for a few minutes to bring back their soft, moist texture.
With these serving suggestions, your 18th century queen cakes will shine at any occasion. Whether you keep it traditional with tea or add a modern twist with whipped cream and fresh berries, these cakes will be the star of the show!
Conclusion
These 18th century queen cakes are a delightful treat that brings a taste of history right into your kitchen. With their rich, buttery texture and delicate citrus and nutmeg flavors, they’re the perfect addition to any occasion. Whether you’re hosting an elegant tea party, celebrating a special moment, or simply indulging in a sweet snack, these cakes never disappoint.
The beauty of this recipe lies in its simplicity, allowing you to customize it to your tastes with various flavor variations like dried fruits, spices, or floral notes. Whether you stick with the classic recipe or experiment with your own twist, the result is always a delicious, comforting cake that’s both nostalgic and timeless.
Don’t forget—queen cakes are more than just a recipe. They’re a piece of history. As you bake, you’re connecting with centuries of tradition, making each bite a special treat. I hope you enjoy these as much as I do, and I’m confident they’ll become a favorite in your baking repertoire!
So, what are you waiting for? Gather your ingredients and bring these beautiful 18th century queen cakes to life!
18th Century Queen Cake Recipe
Ingredients
Main Ingredients
- 1 cup 225g unsalted butter – Softened to room temperature for easy creaming.
- 1 cup 200g granulated sugar – Provides the perfect level of sweetness.
- 4 large eggs – Preferably at room temperature to ensure a smooth batter.
- 1 ¾ cups 220g all-purpose flour – Sifted for a light and fluffy texture.
- ½ cup 50g almond flour – Adds richness and a subtle nutty flavor.
- 1 tsp baking powder – Helps the cakes rise beautifully.
- ½ tsp ground nutmeg – A traditional spice for a warm aromatic note.
- Zest of 1 lemon – Brings a bright citrusy freshness to the mix.
- 2 tbsp candied peel – Optional but adds delightful bursts of flavor.
Optional Add-ins
- ¼ cup currants or raisins – For a traditional touch of sweetness.
- A splash of rose water – Enhances the historical authenticity with floral notes.
Tips for Ingredient Preparation
- Butter and Sugar: Cream these together thoroughly to incorporate air resulting in a soft, tender crumb.
- Eggs: Crack eggs into a separate bowl before adding them to the batter to avoid shells or surprises.
- Almond Flour: If you don’t have almond flour finely ground almonds are a great substitute.
Instructions
Step 1: Prepare Your Workspace
- Preheat your oven to 350°F (175°C).
- Grease a muffin tin or line it with paper cases to prevent sticking and make cleanup easy.
- Gather all your ingredients and tools—this will make the process smooth and enjoyable.
Step 2: Cream Butter and Sugar
- In a large mixing bowl, beat the softened butter and sugar together until the mixture becomes pale and fluffy. This step helps create the light, tender crumb queen cakes are known for.
Step 3: Add the Eggs
- Crack the eggs into the bowl one at a time, mixing well after each addition.
- If the batter looks slightly curdled, don’t worry—it will come together when you add the dry ingredients.
Step 4: Combine the Dry Ingredients
- In a separate bowl, whisk together the all-purpose flour, almond flour, baking powder, and ground nutmeg.
- Gradually add the dry ingredients to the wet mixture, folding gently to avoid overmixing. Overmixing can lead to dense cakes, so aim for a smooth, airy batter.
Step 5: Add Flavor and Optional Ingredients
- Stir in the lemon zest and candied peel for a burst of traditional citrus flavor.
- If you’d like to add currants or a splash of rose water for extra authenticity, now’s the time. Mix gently to ensure even distribution.
Step 6: Fill and Bake
- Spoon the batter into your prepared muffin tin, filling each cup about two-thirds full. This ensures they’ll rise beautifully without spilling over.
- Place the tin in the oven and bake for 20–25 minutes, or until the tops are golden and a toothpick inserted into the center comes out clean.
Step 7: Cool and Finish
- Let the cakes cool in the tin for about 5 minutes, then transfer them to a wire rack to cool completely.
- Dust them lightly with powdered sugar for an elegant finish, or serve them plain for a more traditional presentation.
Notes
FAQs About 18th Century Queen Cakes
1. Can I make 18th century queen cakes ahead of time?
Absolutely! These cakes keep well for a few days at room temperature, and the flavor actually improves as they sit. If you want to make them further in advance, feel free to freeze them. Simply thaw at room temperature and enjoy them fresh, or heat them in the oven to restore their soft texture.
2. What can I use instead of candied peel?
If you’re not a fan of candied peel or don’t have it on hand, you can easily substitute it with finely chopped dried fruits like apricots, raisins, or currants. This adds a chewy texture and extra sweetness to the cakes. Alternatively, fresh lemon or orange zest will also give a lovely citrus boost!
3. Can I make this recipe gluten-free?
Yes! To make these queen cakes gluten-free, simply substitute the all-purpose flour with a gluten-free flour blend. Almond flour already gives the cake a nice moist texture, so the swap should work seamlessly.
4. What can I add to the queen cakes for extra flavor?
Feel free to get creative! You can add a pinch of cinnamon or ginger for a warm, spiced twist. Rose water or orange blossom water are excellent choices for adding a floral, fragrant flavor. For a bit of crunch, mix in chopped almonds or pistachios. The possibilities are endless!
5. Can I make these cakes without the almond flour?
While almond flour adds moisture and richness to the cakes, you can replace it with more all-purpose flour if needed. The texture might be slightly different, but they’ll still turn out delicious.