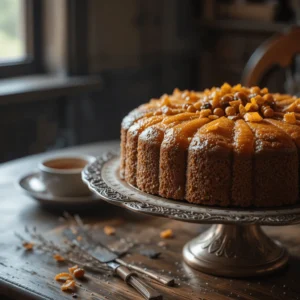
18th Century Queen Cake Recipe
Discover the perfect 18th century queen cake recipe! Delight in this timeless, flavorful treat with a rich history and easy-to-follow instructions.
Ingredients
Main Ingredients
- 1 cup 225g unsalted butter – Softened to room temperature for easy creaming.
- 1 cup 200g granulated sugar – Provides the perfect level of sweetness.
- 4 large eggs – Preferably at room temperature to ensure a smooth batter.
- 1 ¾ cups 220g all-purpose flour – Sifted for a light and fluffy texture.
- ½ cup 50g almond flour – Adds richness and a subtle nutty flavor.
- 1 tsp baking powder – Helps the cakes rise beautifully.
- ½ tsp ground nutmeg – A traditional spice for a warm aromatic note.
- Zest of 1 lemon – Brings a bright citrusy freshness to the mix.
- 2 tbsp candied peel – Optional but adds delightful bursts of flavor.
Optional Add-ins
- ¼ cup currants or raisins – For a traditional touch of sweetness.
- A splash of rose water – Enhances the historical authenticity with floral notes.
Tips for Ingredient Preparation
- Butter and Sugar: Cream these together thoroughly to incorporate air resulting in a soft, tender crumb.
- Eggs: Crack eggs into a separate bowl before adding them to the batter to avoid shells or surprises.
- Almond Flour: If you don’t have almond flour finely ground almonds are a great substitute.
Instructions
Step 1: Prepare Your Workspace
- Preheat your oven to 350°F (175°C).
- Grease a muffin tin or line it with paper cases to prevent sticking and make cleanup easy.
- Gather all your ingredients and tools—this will make the process smooth and enjoyable.
Step 2: Cream Butter and Sugar
- In a large mixing bowl, beat the softened butter and sugar together until the mixture becomes pale and fluffy. This step helps create the light, tender crumb queen cakes are known for.
Step 3: Add the Eggs
- Crack the eggs into the bowl one at a time, mixing well after each addition.
- If the batter looks slightly curdled, don’t worry—it will come together when you add the dry ingredients.
Step 4: Combine the Dry Ingredients
- In a separate bowl, whisk together the all-purpose flour, almond flour, baking powder, and ground nutmeg.
- Gradually add the dry ingredients to the wet mixture, folding gently to avoid overmixing. Overmixing can lead to dense cakes, so aim for a smooth, airy batter.
Step 5: Add Flavor and Optional Ingredients
- Stir in the lemon zest and candied peel for a burst of traditional citrus flavor.
- If you’d like to add currants or a splash of rose water for extra authenticity, now’s the time. Mix gently to ensure even distribution.
Step 6: Fill and Bake
- Spoon the batter into your prepared muffin tin, filling each cup about two-thirds full. This ensures they’ll rise beautifully without spilling over.
- Place the tin in the oven and bake for 20–25 minutes, or until the tops are golden and a toothpick inserted into the center comes out clean.
Step 7: Cool and Finish
- Let the cakes cool in the tin for about 5 minutes, then transfer them to a wire rack to cool completely.
- Dust them lightly with powdered sugar for an elegant finish, or serve them plain for a more traditional presentation.
Notes
Adjusting for Moisture: If the batter seems too thick, add a tablespoon of milk or water at a time to achieve the desired consistency. The batter should be thick but pourable.
Flavor Variations: Feel free to experiment with different dried fruits, such as raisins, currants, or apricots, to customize the flavor. You can also add a splash of orange or lemon zest for extra citrusy brightness.
Ensure Even Baking: For best results, evenly space the cakes on the baking tray to ensure consistent heat distribution. If using a muffin tin, lightly grease the cups to prevent sticking.