
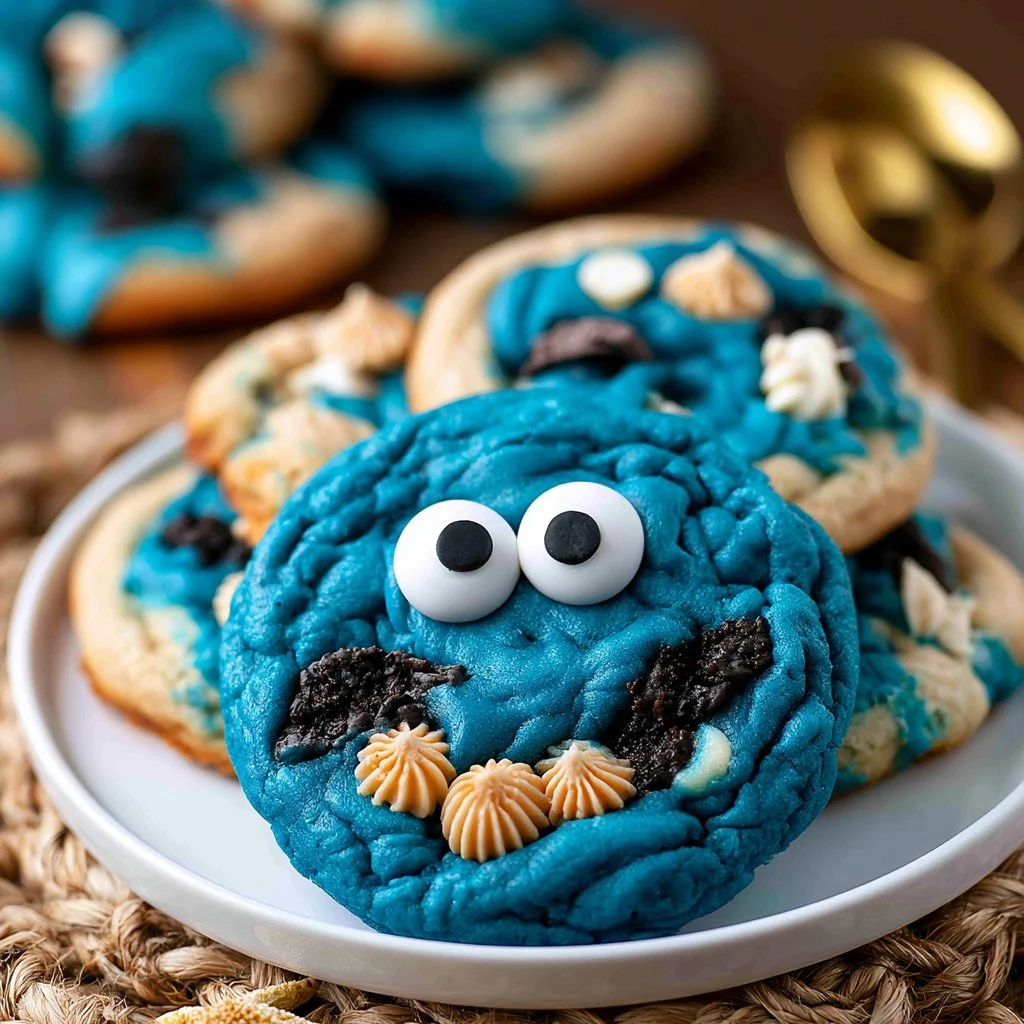
Baking is one of those lovely activities that brings a comforting rhythm to my day. There’s something magical about the way dough transforms in the oven, filling the kitchen with delightful aromas. Cookie Monster Cookies are a feast for the eyes and the taste buds, with vibrant colors and a sweet, indulgent mix of textures. This recipe delivers a playful take on classic cookies, perfect for sharing or simply enjoying during a quiet moment.
Why This Cookie Monster Cookies Recipe Works
Cookie Monster Cookies are dependable because they blend soft, chewy dough with crunchy bits from chopped cookies and rich white chocolate chips. The balance of brown sugar and granulated sugar brings a depth of flavor that makes each cookie incredibly satisfying. They’re practical too, requiring simple ingredients and straightforward steps, so you can whip up a batch easily for any occasion.
Kitchen Tools for Cookie Monster Cookies
- Mixing bowls
- Electric mixer
- Cookie scoop
- Baking sheet
- Silicone baking mat or parchment paper
Ingredients
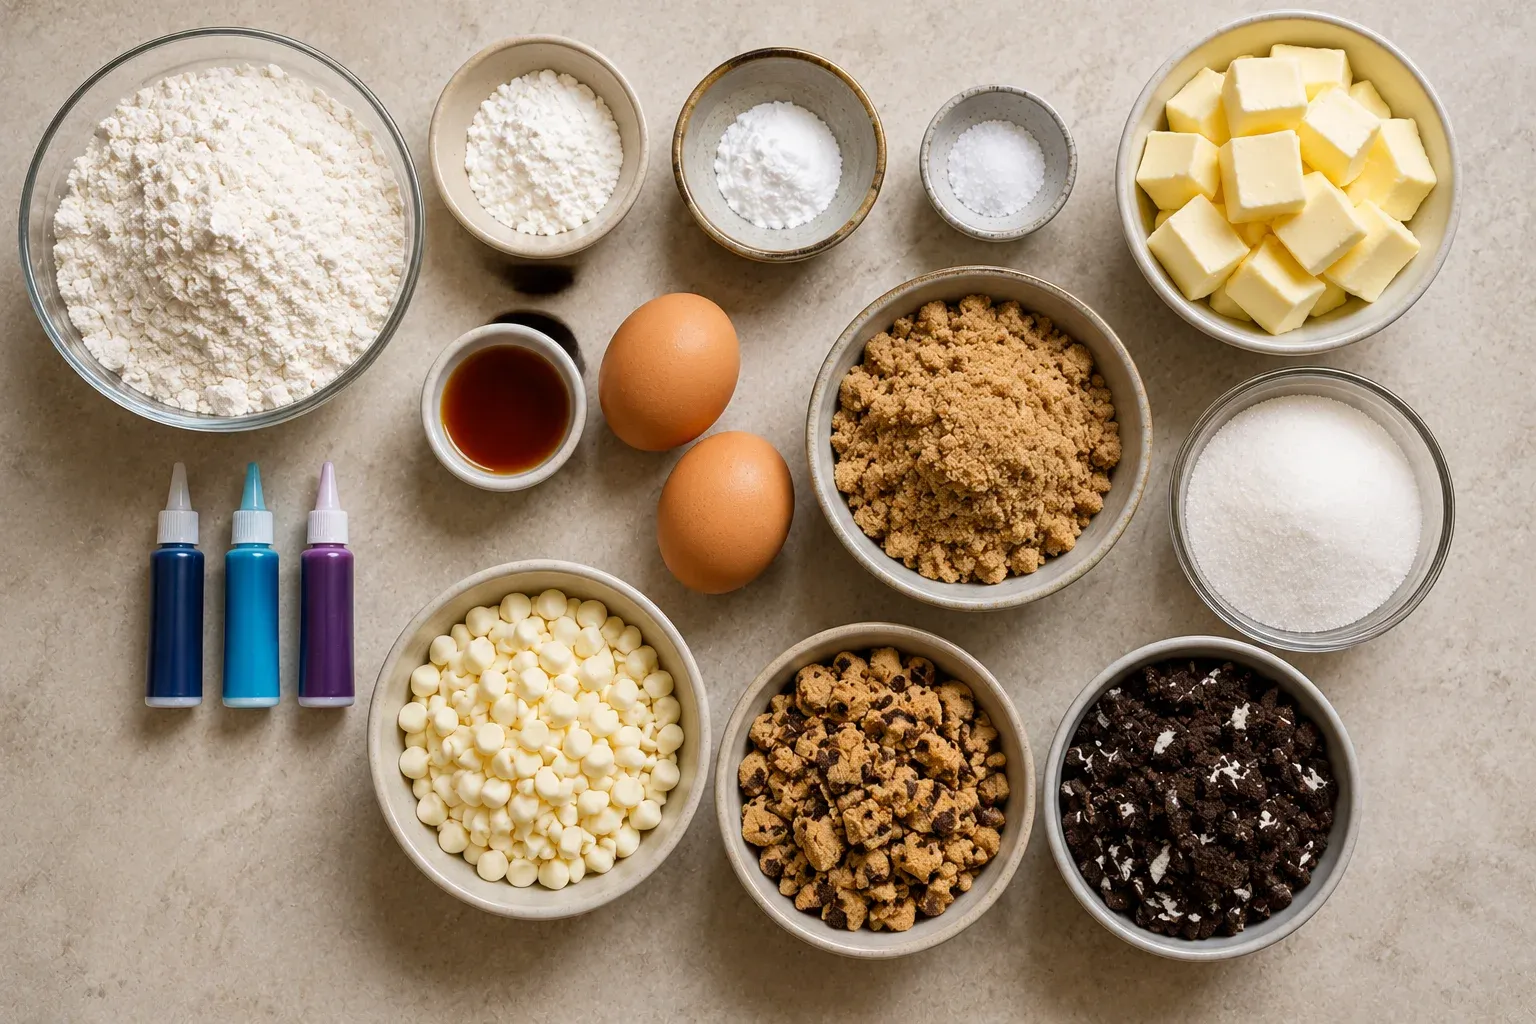
- 3 cups (360g) all-purpose flour
- 2 tsp cornstarch
- 1 tsp baking soda
- ¼ tsp salt
- 1 cup (226g) unsalted butter, room temperature
- 1 ¼ cups (267g) brown sugar
- ¼ cup (50g) granulated sugar
- 2 large eggs, room temperature
- 1 tsp vanilla extract
- Royal blue gel food coloring
- Electric blue gel food coloring
- Violet gel food coloring
- ⅔ cup (113g) white chocolate chips
- ⅔ cup chopped Chips Ahoy cookies
- ⅔ cup chopped Oreos
How to Make Cookie Monster Cookies
Step 1. Begin by preheating your oven to 350º F, setting the stage for those cookies to bake perfectly. Line a cookie sheet with either a silicone mat or parchment paper, which will help prevent sticking and make cleanup easier. This initial preparation is essential for creating a smooth baking experience.
Step 2. In a mixing bowl, combine the flour, cornstarch, baking soda, and salt. Give it a good stir to ensure everything is evenly mixed. This dry mixture forms the foundation of your dough, aiding in structure and texture. Set it aside for later.
Step 3. In a larger mixing bowl, place the room temperature butter, brown sugar, and granulated sugar. Beat these together on medium speed for about two minutes until the mixture becomes fluffy and light in color. This step is crucial; it adds air to your cookie dough, contributing to a delightful texture.
Step 4. Add the eggs and vanilla extract to the butter and sugar mixture, then beat for an additional 30 seconds. You want the eggs to blend well, lending moisture and richness while the vanilla enhances the overall flavor. The mixture should come together smoothly.
Step 5. Gradually incorporate your dry ingredient mixture into the wet ingredients while mixing at low speed. This prevents the flour from flying everywhere and creates a more cohesive dough. Once the flour is just combined, stop mixing to avoid overworking the dough.
Step 6. Now comes the fun part: add food coloring to the dough, mixing in small amounts until you reach your desired shade of blue. The vibrant colors are what make these cookies stand out. Don’t rush; enjoy the process of transforming your dough.
Step 7. Using a sturdy spatula, gently fold in ⅓ cup of white chocolate chips, chopped Chips Ahoy cookies, and Oreos. This mixture of ingredients will bring bursts of flavor and varied textures to each bite, making your cookies exciting and delicious.
Step 8. Use a cookie scoop to create uniform dough balls, about two tablespoons each. Roll them smooth between your hands, then press some of the remaining chocolate chips and cookie pieces onto their exterior for added visual appeal and extra bites of flavor.
Step 9. Place about eight of these dough balls onto the prepared cookie sheet, leaving adequate space between them. This spacing helps them spread evenly while baking, ensuring a delightful texture all around.
Step 10. Bake your cookies in the preheated oven for around 10 to 12 minutes. Keep an eye on them and pull the cookies out before the edges start to brown. Underbaking slightly helps to maintain a soft, chewy center, creating the perfect balance with a slight crisp on the outside.
Step 11. Once baked, allow the cookies to cool on the baking sheet for about 15 minutes before transferring them to a wire rack. This cooling time allows them to firm up a bit, making them easier to handle without breaking.
Serving Ideas for Cookie Monster Cookies
These cookies shine alongside a glass of milk or as part of a cozy dessert table. If you have leftovers, stash them in an airtight container for a few days, maintaining their lovely softness. They’d also make a hearty treat for lunch boxes or a fun addition to gatherings where guests can indulge in this colorful delight. Consider pairing them with ice cream for a scrumptious dessert sundae, incorporating the popular cookie bits.
Practical Tips for Cookie Monster Cookies
- Ensure your butter is at room temperature for optimal creaming with sugars, resulting in a lighter texture.
- Measure flour accurately, scooping it into the measuring cup and leveling it off, to prevent dry cookies.
- Folding in the added ingredients gently preserves the air you’ve mixed into the dough, keeping your cookies light.
- Allow baked cookies to cool thoroughly before storing to maintain their moisture and prevent them from becoming soggy.
Common Mistakes to Avoid
- Using cold butter: Cold butter won’t cream well with sugars, leading to dense cookies. Always bring your butter to room temperature before starting the recipe.
- Overmixing the dough: Mixing too long after adding the flour can develop gluten, leading to tough cookies. Mix until just combined.
- Underbaking the cookies: Pulling cookies out too soon results in a doughy center, while overbaking can make them hard. Watch them closely for the right moment.
- Skipping the cooling time: Allowing cookies to cool on the baking sheet prevents them from falling apart. Don’t rush this step for perfect texture.
- Not using enough baking sheets: Crowding too many cookies on one sheet can lead to uneven baking. Always space them out for consistent results.
- Inaccurate ingredient measurements: Scooping flour directly can pack it down, leading to too much in the mix. Use a spoon to aerate and then measure for accuracy.
Simple Variations
While the original recipe is delightful as is, you could consider adjusting the colors for seasonal themes or special occasions. Just remember to keep the base flavor and structure intact by maintaining the core ingredients.
Storage & Reheating
Store your cookies in an airtight container at room temperature for up to five days. If you want to keep them longer, they can also be refrigerated, where they may last up to a week. For extended storage, freeze the cookie dough balls before baking them. When ready to enjoy, you can bake from frozen, adding an extra minute to the baking time.
Frequently Asked Questions
Can I make this recipe ahead of time?
Yes, you can prepare the dough and refrigerate it for up to 24 hours before baking. This allows the flavors to meld and can enhance the overall taste.
How long does it last in the fridge?
Cooked Cookie Monster Cookies can be stored in the fridge for up to a week. Just make sure they’re in a sealed container to retain freshness.
Can I freeze this recipe?
Yes, you can freeze both the baked cookies and the unbaked dough. Just remember to use airtight containers or freezer bags to avoid freezer burn.
What can I substitute for one ingredient?
If any ingredient is unavailable, a similar type of sugar or chocolate could work, though this may change the flavor profile slightly. However, for best results, it’s ideal to stick to the original recipe.
Why didn’t my recipe turn out as expected?
Variations in oven temperature, ingredient freshness, or measuring technique can all affect the final product. Make sure to check your oven’s accuracy and use precise measuring methods for best results.
Final Thoughts
Baking Cookie Monster Cookies offers a wonderful mix of flavor, texture, and visual appeal, giving you a treat that’s as enjoyable to make as it is to taste. With straightforward steps, this recipe invites creativity, allowing you to personalize the color and energy of your cookies. Embrace the process and savor the rewarding experience of homemade goodness. Each batch is a chance to create joyful memories in the kitchen, all while enjoying the delightful company of your tasty creations.

Cookie Monster Cookies
Ingredients
Dry Ingredients
- 3 cups 3 cups all-purpose flour Sifted
- 2 tsp 2 tsp cornstarch
- 1 tsp 1 tsp baking soda
- ¼ tsp ¼ tsp salt
Wet Ingredients
- 1 cup 1 cup unsalted butter, room temperature
- 1 ¼ cups 1 ¼ cups brown sugar Packed
- ¼ cup ¼ cup granulated sugar
- 2 large 2 large eggs, room temperature
- 1 tsp 1 tsp vanilla extract
Coloring and Mix-ins
- Royal blue gel food coloring to achieve desired color
- Electric blue gel food coloring to achieve desired color
- Violet gel food coloring to achieve desired color
- ⅔ cup ⅔ cup white chocolate chips
- ⅔ cup ⅔ cup chopped Chips Ahoy cookies
- ⅔ cup ⅔ cup chopped Oreos
Instructions
Preparation
- Preheat your oven to 350º F and line a cookie sheet with a silicone mat or parchment paper.
- In a mixing bowl, combine the flour, cornstarch, baking soda, and salt, mixing well and set aside.
Making the Dough
- In a larger bowl, beat the butter, brown sugar, and granulated sugar on medium speed until fluffy and light in color.
- Add the eggs and vanilla extract, and beat again until well combined.
- Gradually mix in the dry ingredients at low speed until just combined.
- Add food coloring to the dough, mixing until the desired shade of blue is reached.
- Gently fold in the white chocolate chips, chopped Cookies Ahoy, and Oreos.
Baking
- Use a cookie scoop to form dough balls, rolling them smooth and placing some chocolate chips on top.
- Place dough balls on the prepared baking sheet, leaving space between each.
- Bake for 10 to 12 minutes, removing them when edges are set but centers are still soft.
- Allow cookies to cool on the baking sheet for 15 minutes before transferring to a wire rack.